|
|
|
|
|
 |
be the perfect host/ess |
. |
|
||||||||||||
copyright ©1999-2000 |
Which is why this year, I’ve resolved to get back to basics. Anything so elaborate that its construction can’t be readily duplicated by my boyfriend – whose help I will, I guarantee, be enlisting – simply won’t do. No crazy cut-outs, no complex mosaics, no cleverly- constructed pop-ups. Card-making, like gift-giving or party-throwing, should be done out of love, not social obligation or some stupid need to impress. Because, let’s face it, the holidays pass, the cards get tossed, and all anyone remembers is that you took the time to send something, regardless of whether it’s a work of art. So this year, I’m just going to have fun. Looking to make your own holiday cards this year? Get crafty with a few of these ideas … Quick and Easy… Get the handmade look with a minimum of fuss – foam stamps, available at craft 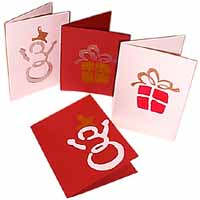 stores, are ultra-cheap (from $.50 to $1.50 at my local Michael’s),
and come in an assortment of surprisingly funky, stylized shapes. Smooth
cardstock will produce the cleanest edges, but textured papers can
produce interesting effects as well.
stores, are ultra-cheap (from $.50 to $1.50 at my local Michael’s),
and come in an assortment of surprisingly funky, stylized shapes. Smooth
cardstock will produce the cleanest edges, but textured papers can
produce interesting effects as well.
materials | acrylic paints (cheap craft paint will do fine), foam stamps, cardstock/watercolor paper, plastic plate (or other flat surface where you can squeeze out your paints), cheap paintbrushes 1. Cut your cardstock to desired size. Use a self-healing cutting mat if you’ve got one (if you’re at all into the crafty thing, I highly recommend investing in one), available at arts and crafts stores, or a piece of cardboard. Fold the card in half. Hint: If your cardstock is too thick to fold easily, place a straightedge on the outside of the card, along the fold line, then lightly run a razor knife along the ruler to score the paper.2. Squeeze out a small blob of each of your paints onto your plastic plate. 3. Carefully paint your foam stamp – you’ll want a nice, even layer of color, not too gloopy. Paint different portions of your stamp using different colors. 4. Decide where you want to position your image. Centered looks fine, but consider other possibilities as well -- off to the edge, or in one of the lower corners, for instance. 5. Press your stamp down on the paper, firmly and evenly to make sure that the paint transfers. Lift the stamp straight up. Let dry. want something a bit more challenging? ---------------------------> lounge . nourish . host . laze . home .
|
||||||||||||||