 |
|
|
|
 |
|
. |
|
||||||||||||||
copyright ©1999-2002 |
If you’re the precise-sort who’d rather work out the numbers instead of playing it by eye, measure the width and height of the image*. Subtract the image width from the frame width, then divide by two to determine the left-right border width. Subtract the image height from the frame height, then divide by two to determine the top-bottom border width. *NOTE: Because you’ll be attaching the picture to the backing board using photo corners, and you won’t want the photo corners to show, allow an additional ¼" on all sides if your picture extends all the way to the edges of the paper. For example: if your picture is 8"x10", you’ll need your window to actually be 7.5"x9.5". 4 Before you make any cuts, measure the pencilled rectangle and make sure that it’s no bigger than the size of your image (if anything, you should err on the very-slightly-smaller side, to make sure that your picture will completely fill the window once it’s been cut). You’ll also want to verify that the pencilled rectangle sits square with respect to the edge of the mat board, using your t-square. Once you’ve made certain that you’ve measured everything properly, you’re ready to cut out that window. If you’re using a mat cutter, just follow the directions that come with your specific tool. If you’re going low-tech, use that yardstick as a guide, and line it up with your pencil marks. Don’t try and cut the board in a single-go – score the mat board with your first cut to create a guide for the knife, then go over the same cut until you’ve sliced through the board. Be extra-careful when you reach the corners. Pop out the inner rectangle of mat board and save it for future projects.
keep on wandering yonder please ---------------------------> lounge . nourish . host . laze . home. |
||||||||||||||||


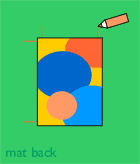 If
you’re math-phobic or just plain too lazy to bother with calculations,
the easiest way to make sure the picture is centered is to place it
approximately in the middle of the board. Measure the distance from the
edge of the image to the edge of the mat board on both the left and
right sides, then nudge the picture left or right as necessary until the
two measurements are exactly the same. Mark the placement for the left
and right edges of the picture on the mat board using a light pencil
mark*. Use the same technique (if you can call it that) to determine the
top-bottom placement. At each
If
you’re math-phobic or just plain too lazy to bother with calculations,
the easiest way to make sure the picture is centered is to place it
approximately in the middle of the board. Measure the distance from the
edge of the image to the edge of the mat board on both the left and
right sides, then nudge the picture left or right as necessary until the
two measurements are exactly the same. Mark the placement for the left
and right edges of the picture on the mat board using a light pencil
mark*. Use the same technique (if you can call it that) to determine the
top-bottom placement. At each 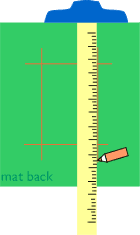 mark,
square your t-square with the edge of the mat board and line up the
straight edge with the pencilled mark. Extend each line well beyond
where it meets another line at the corners.
mark,
square your t-square with the edge of the mat board and line up the
straight edge with the pencilled mark. Extend each line well beyond
where it meets another line at the corners.