|
|
|
|
|
 |
make your
stomach happy |
. |
|
|||||||||||
copyright ©1999-2004 |
easy
as pie
how to
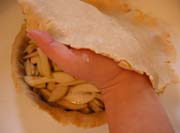
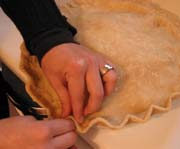
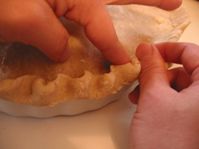
make a better pie crust by Yee-Fan Sun | 1 2 3 4 continued from page 3 forming the
crust
Otherwise, proceed directly to decorating your crust. Here are two of the most common methods to pretty up that border:
Once you've finished your crust, pop it in the fridge for an hour, or the freezer for twenty minutes, until it firms up again. Bake as directed in your recipe (don't forget to make a few slits in the top crust of a double crust to give the steam an escape route). blind
baking Preheat the oven to 425F. Meanwhile, prick the crust all over the bottom with a fork. Line the crust with foil, and weight it down. You can get pie weights at any cooking store; alternatively, a couple of cups of dried beans or uncooked rice work just fine as well (and can be saved for this same use in the future). Slide the crust into the oven, and bake for 12 minutes. Pull the crust out of the oven and carefully remove the foil and weights. Lower the heat to 350F, pop the crust back in, and bake for another 10-15 minutes, until the crust is firmed up and a lovely golden-brown. (If your recipe calls for more oven time once you add the filling, remove the crust from the oven a little earlier.) o o o If all this seems hopelessly complicated, trust me: it's all a lot easier once you just get your hands into that dough and start working. And after a few gos at it, you'll be able to make a great homemade pie crust with barely a glance at a recipe book at all. get the printer-friendly instructions! o check
out these related articles: ---------------------------> lounge . nourish . host . laze . home. |