| .. |
big
decorating
dreams. tiny
little
budget.
don't
be a wallflower! jump
on over to the discussion boards
and get decorating help.
|
copyright ©1999-2005
DigsMagazine.com.
|
dough
it right
how to make salt dough ornaments
by Yee-Fan Sun |
1
2 3 4
continued from page 1
basic
salt dough
1 cup fine-grained salt
¾ cup very warm tap water, or a smidge more
2 cups flour
1 Tbsp. cooking oil (for a smoother dough)
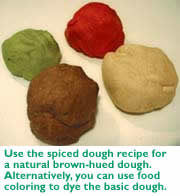
For colored salt dough, you'll
also need some food coloring. The cheapie liquid kind works, but you may
find you need to add a smidge more flour to keep the dough workable.
Alternatively, the pricier concentrated gel paste food coloring will
give you the brightest, deepest hues without adding much liquid to the
mix.
spiced
salt dough
For a yummy smell and a naturally pretty brown hue, try this variation.
1 cup fine-grained salt
¾ cup very warm tap water, or a smidge more
1½ cups flour
½ cup cinnamon
1 tsp. nutmeg
1 Tbsp. cooking oil
1
Whichever version of the dough you're using, combine the salt and warm
water in a big mixing bowl; stir well until the water turns cloudy and
the salt is just about dissolved. Stir in the oil.
2
In another bowl, add the flour. If you're making the spiced dough,
you'll also want to stir in the spices with a fork, until well combined.
3
Add the flour/flour mixture to the liquid a little at a time, and use a
wooden spoon to work it in. The mixture will start to clump up; when the
spoon stops doing anything, switch to your hands and start kneading. You want to get
the dough to the point where it feels cohesive and has some elasticity to it; this'll take at least five minutes or so of
kneading, and as much as ten. You may find that you need to add a smidge more water to get the dough
soft and pliable; add the water just a few drops at a time as needed.
When the dough starts to come together, it also helps to switch to
kneading on the countertop rather than in the bowl.
 4
At this point, if you're working with the basic salt dough and want to
create some pretty colors, separate the dough into however many colors
you want. Get yourself some rubber gloves and put them on, as working
with food coloring tends to produce a bit of a mess. Place a lump of
dough in a stainless steel (or other non-porous,
non-food-coloring-absorbing) bowl; drop some food coloring on the dough.
Work the coloring into the dough, kneading until you have a nice uniform
color, and adding more food coloring as necessary until you're happy
with the hue. Bear in mind that colors will fade a lot once the dough is
baked, so it's best to get the colors fairly vivid. If the dough starts
getting sticky from the liquid in the food coloring, add in a little
more flour as necessary. 4
At this point, if you're working with the basic salt dough and want to
create some pretty colors, separate the dough into however many colors
you want. Get yourself some rubber gloves and put them on, as working
with food coloring tends to produce a bit of a mess. Place a lump of
dough in a stainless steel (or other non-porous,
non-food-coloring-absorbing) bowl; drop some food coloring on the dough.
Work the coloring into the dough, kneading until you have a nice uniform
color, and adding more food coloring as necessary until you're happy
with the hue. Bear in mind that colors will fade a lot once the dough is
baked, so it's best to get the colors fairly vivid. If the dough starts
getting sticky from the liquid in the food coloring, add in a little
more flour as necessary.
5
Store the bits of dough in a tightly sealed container, or wrapped snugly
in plastic wrap, until you're ready to use.
keep
on moseying
--------------------------->
lounge . nourish .
host
. laze . home.
|