 |
|
| |
|
 |
|
. |
|
||||||||||||||
copyright
©1999-2000 |
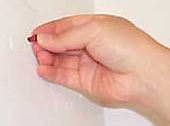
9. Once you’ve got your holes drilled, pop in those anchors, banging them gently with a blunt object to help them go in. 10.
Now you’re ready to screw in your brackets to the wall. For each
bracket, you’ll have to line it up, as best you can, with the
plastic-filled holes. Don’t panic if you find that your holes don’t
line up 11.
Almost t And voilà – you’ve got yourself some corner shelves. If you want the brackets to blend in more with the walls, paint them in the same color as your walls (make sure you mask off the wall area before you start attacking those brackets with the brush). Otherwise, start filling up those shelves! get the printer-friendly directions o check
out these related
articles: ---------------------------> lounge . nourish . host . laze . home.
|
||||||||||||||||


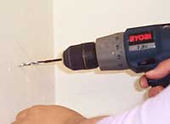
 exactly right – as long as your screw goes somewhere
into the
plastic part, you’ll be fine. Screw your brackets into place, using
the ¾" screws that came with the plastic anchors – an electric
screwdriver comes in handy, but you can do it by hand if you must.
exactly right – as long as your screw goes somewhere
into the
plastic part, you’ll be fine. Screw your brackets into place, using
the ¾" screws that came with the plastic anchors – an electric
screwdriver comes in handy, but you can do it by hand if you must.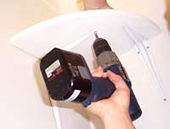 here now … place the
shelf on its brackets and, pressing down firmly on the top of the shelf
while you work, use the ½" screws to attach the brackets to the
bottom of the shelf.
here now … place the
shelf on its brackets and, pressing down firmly on the top of the shelf
while you work, use the ½" screws to attach the brackets to the
bottom of the shelf.